🚲 Bike: Decathlon Riverside hybrid
🔧 Upgrade: TOSEEK carbon rigid fork
📍 Part 1 of the Riverside upgrade series
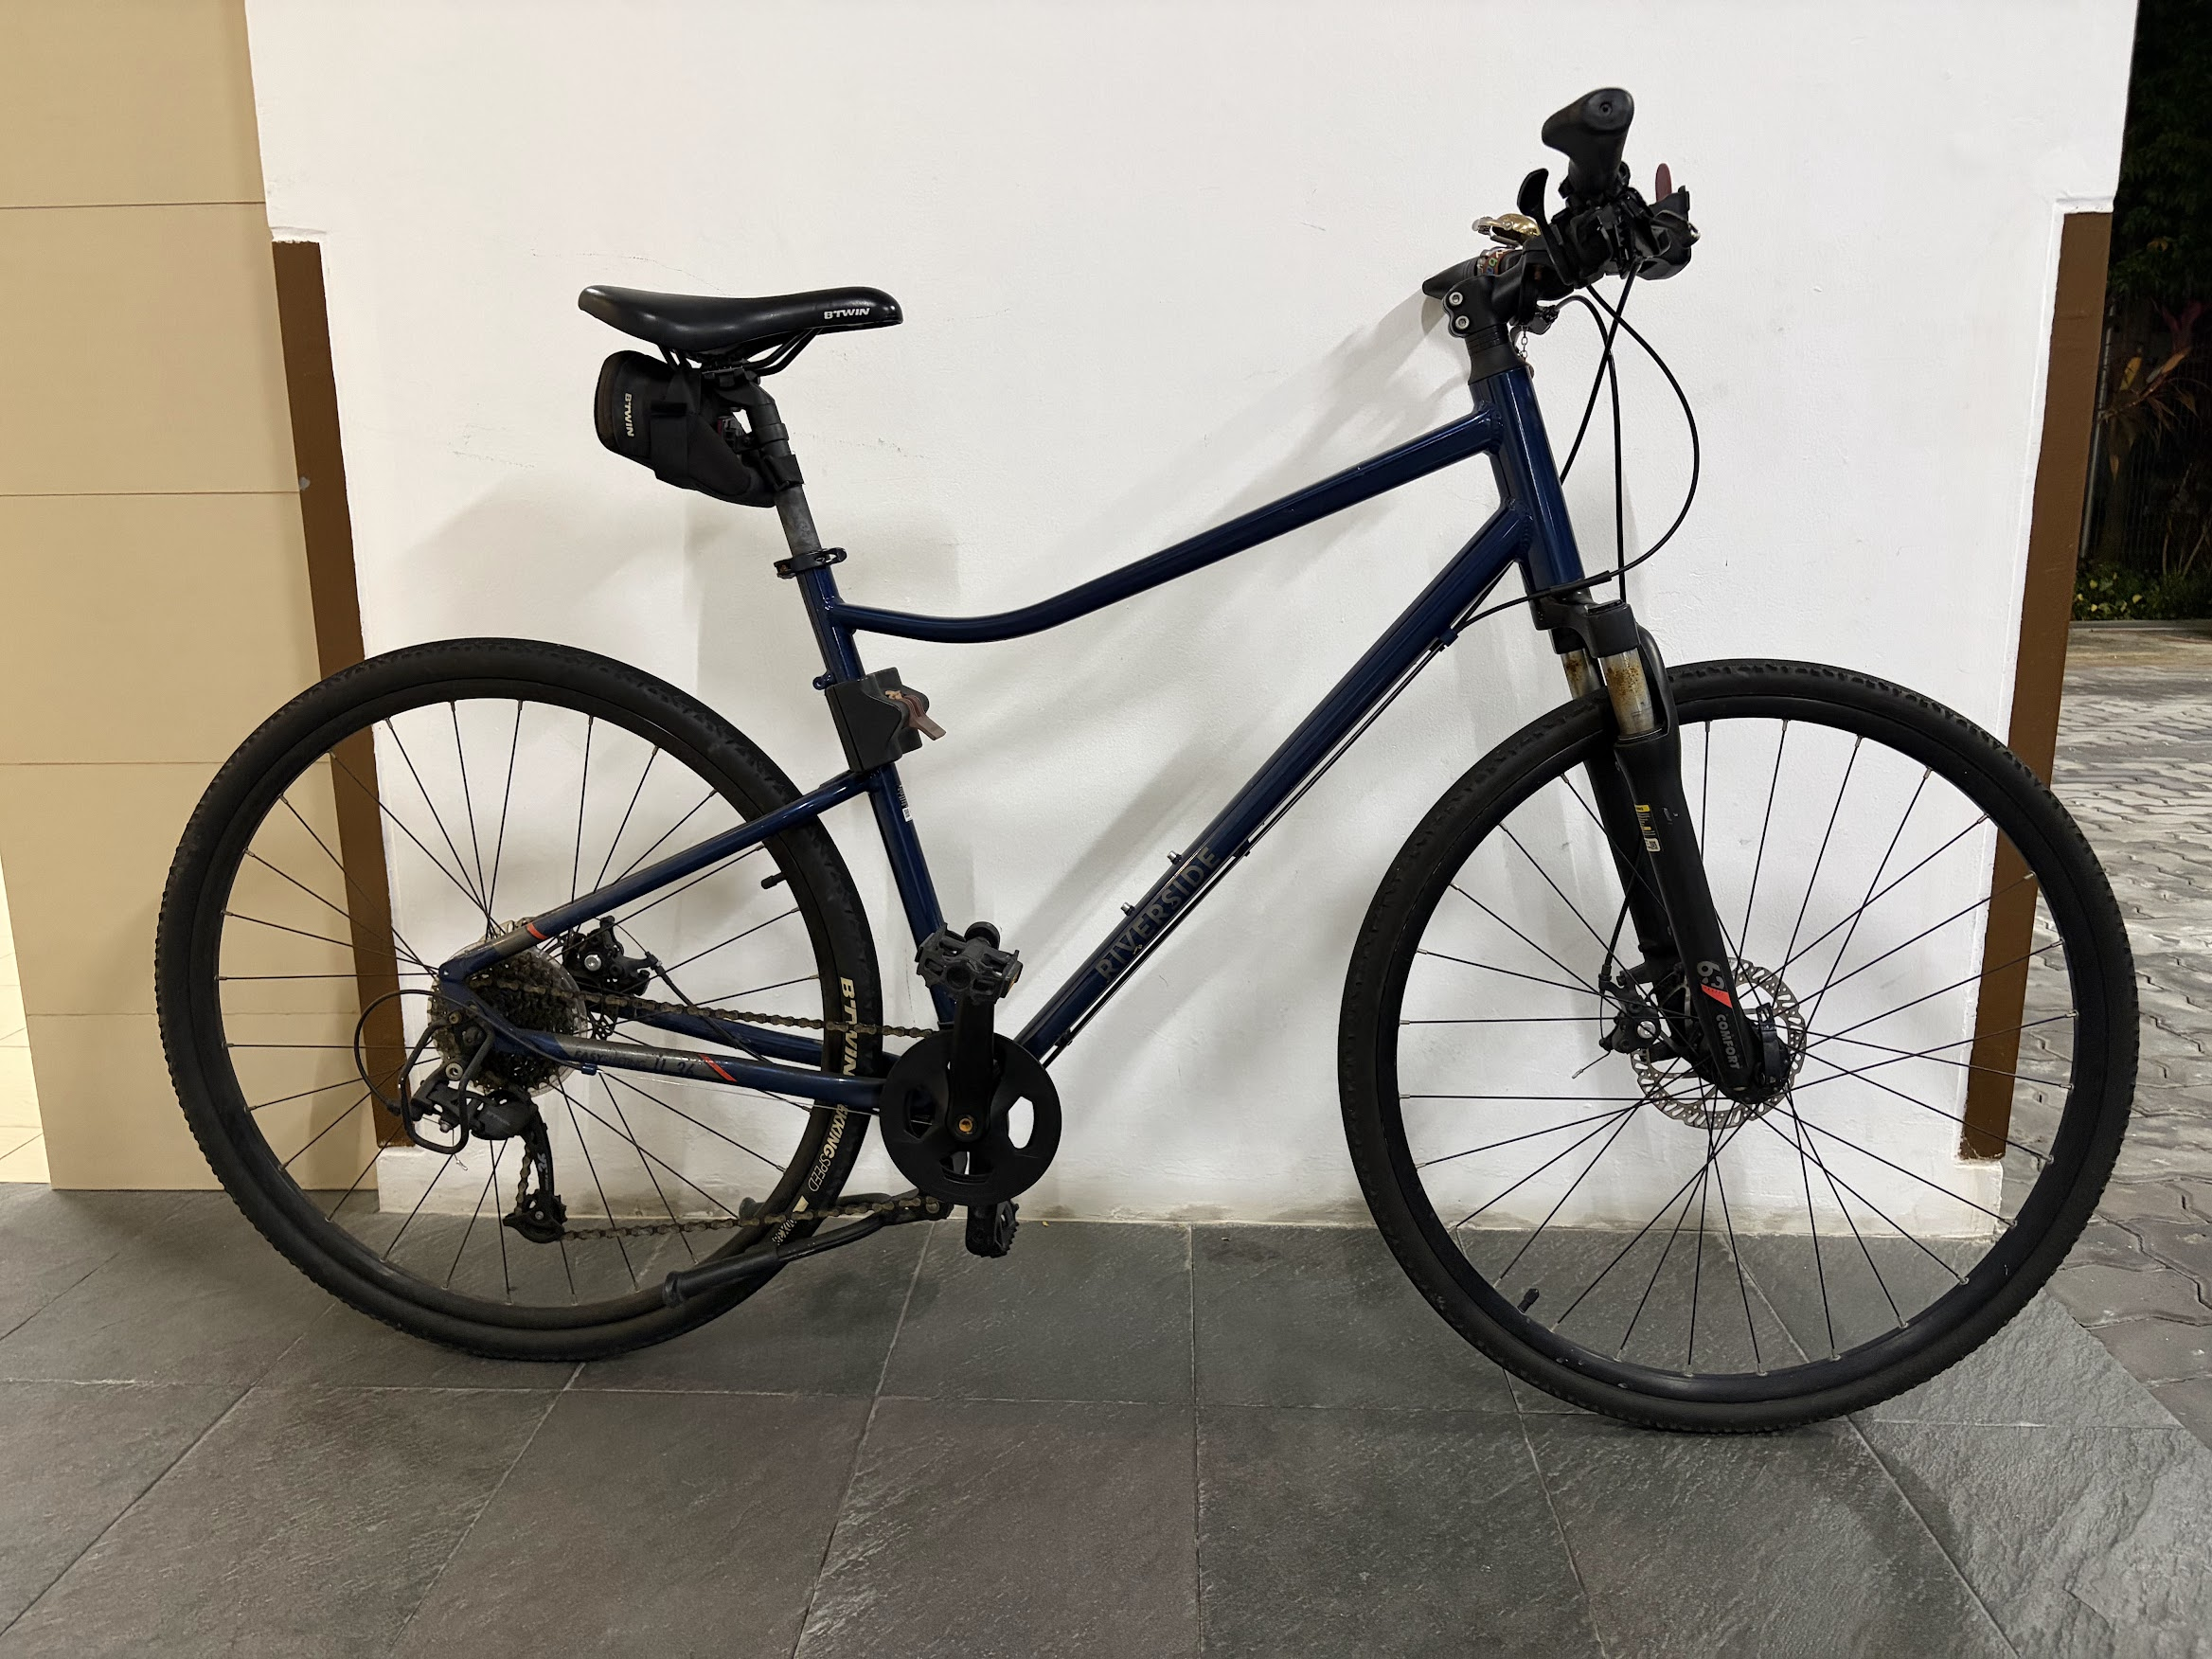
My commuter is a Decathlon Riverside — a practical step-through hybrid that handles daily duties: grocery runs, short errands, and the occasional evening spin around the neighborhood. It came with a Zoom suspension fork branded “63 COMFORT,” which sounds reassuring until you realize it adds unnecessary weight and flex on smooth tarmac.
🔍 Why Swap the Fork#
The stock Zoom suspension fork is heavy, vague, and designed for terrain I never ride. On flat Singapore roads it just bobs under pedaling effort and adds dead weight. A rigid fork is the single best upgrade for a hybrid used primarily on pavement:
| Stock Fork | Rigid Fork |
|---|---|
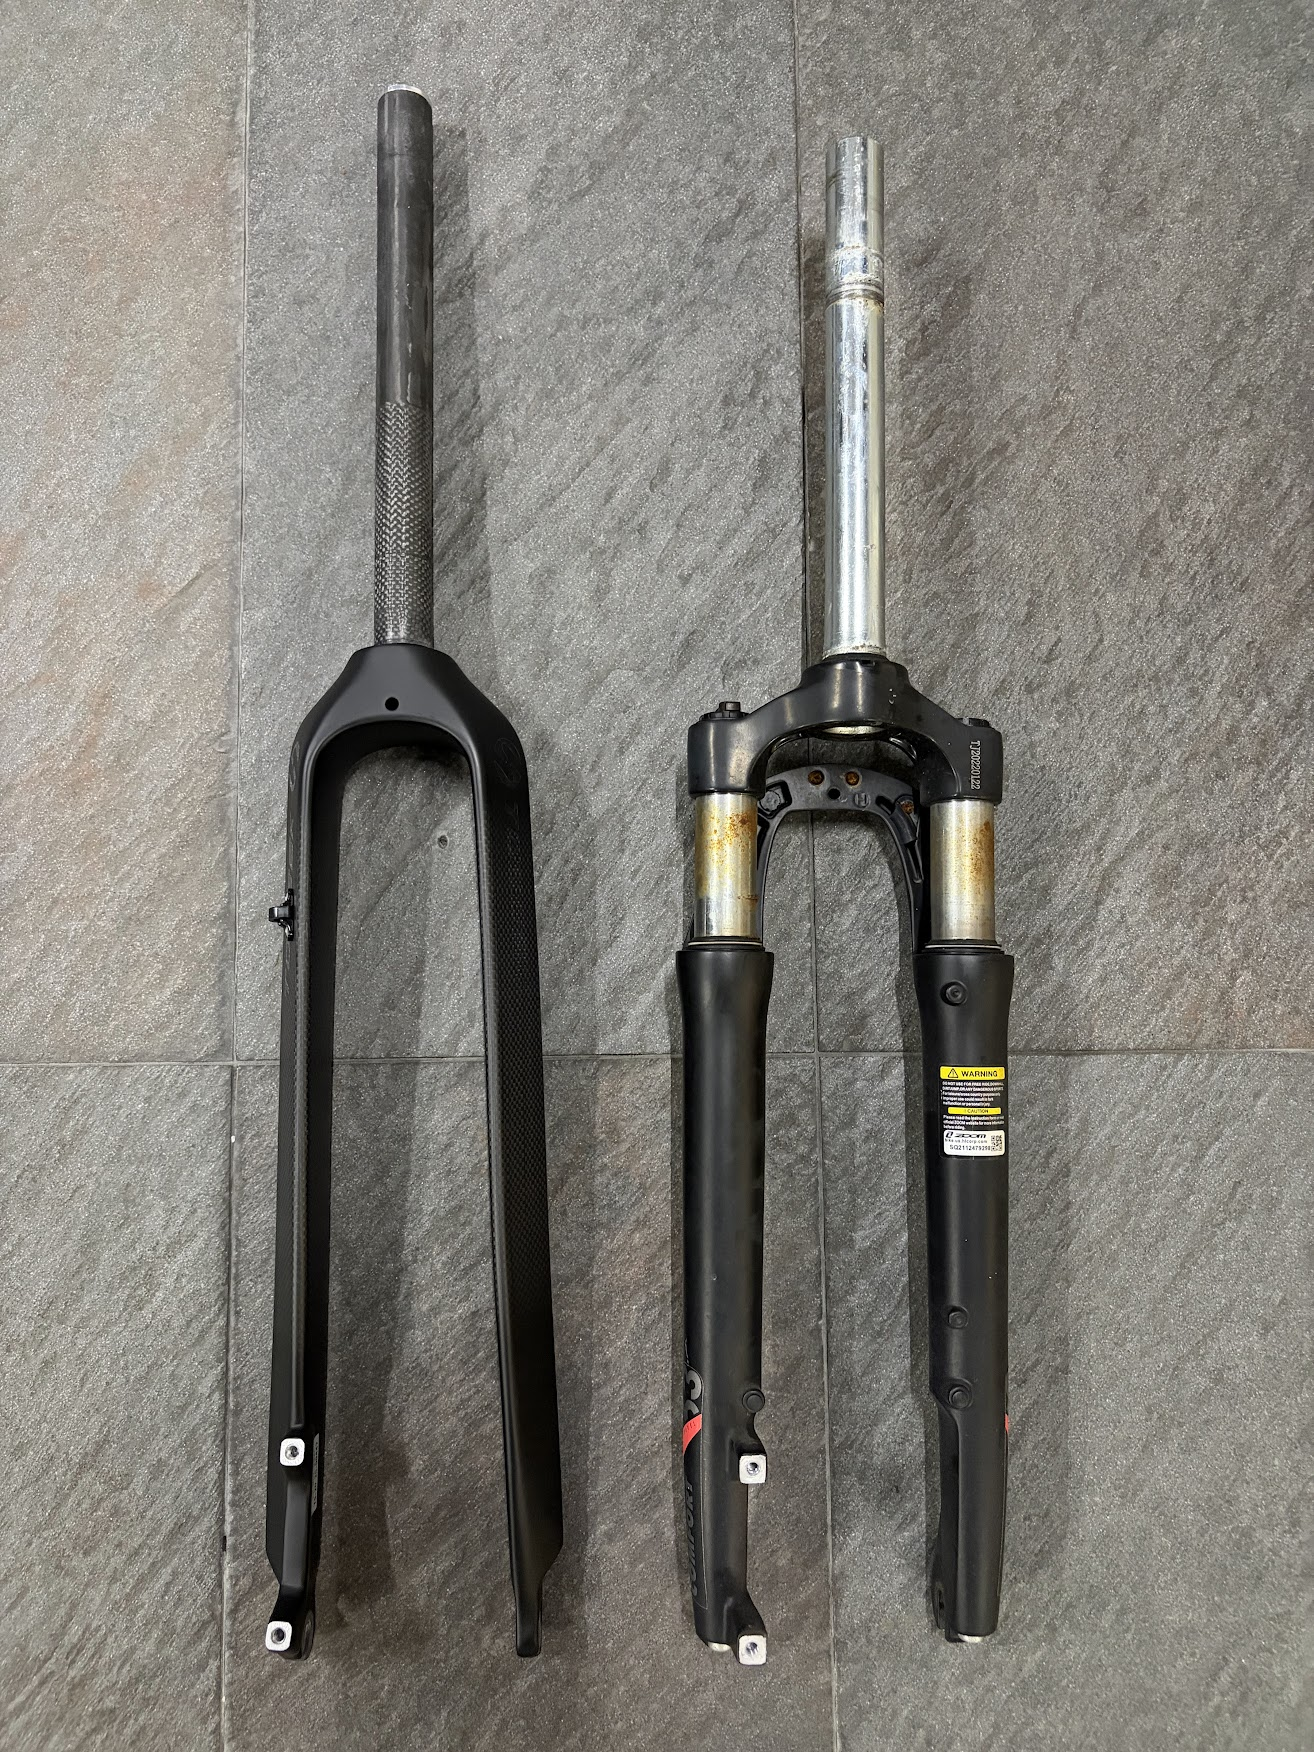
| Zoom coil suspension | TOSEEK carbon |
| ~1.8 kg | ~0.5 kg |
| Flex under braking | Direct steering feel |
| Seals & stanchions to maintain | Zero maintenance |
🆕 The Fork: TOSEEK Carbon Rigid#
I went with a TOSEEK carbon rigid fork from AliExpress. Key specs that had to match the stock geometry:
| Spec | Value |
|---|---|
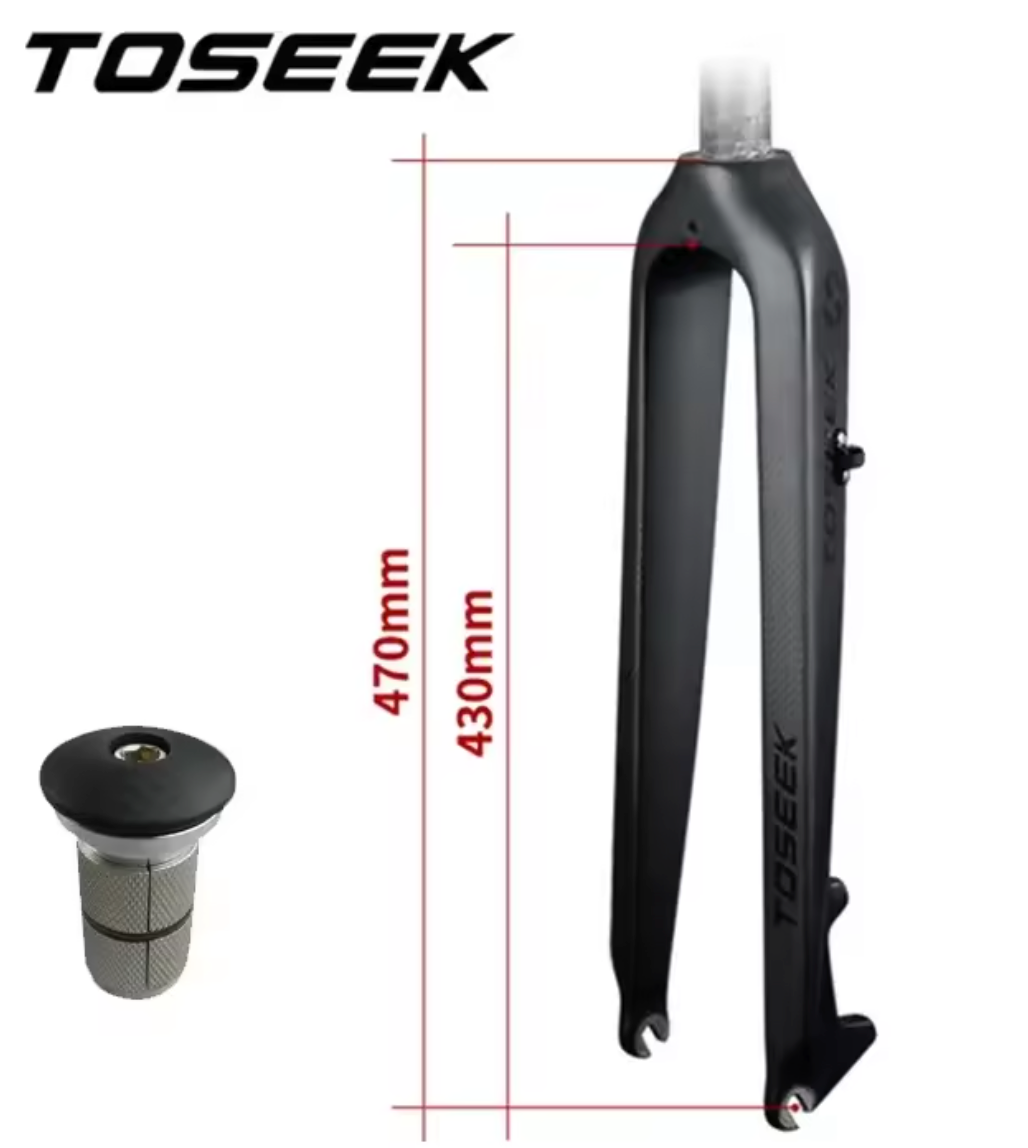
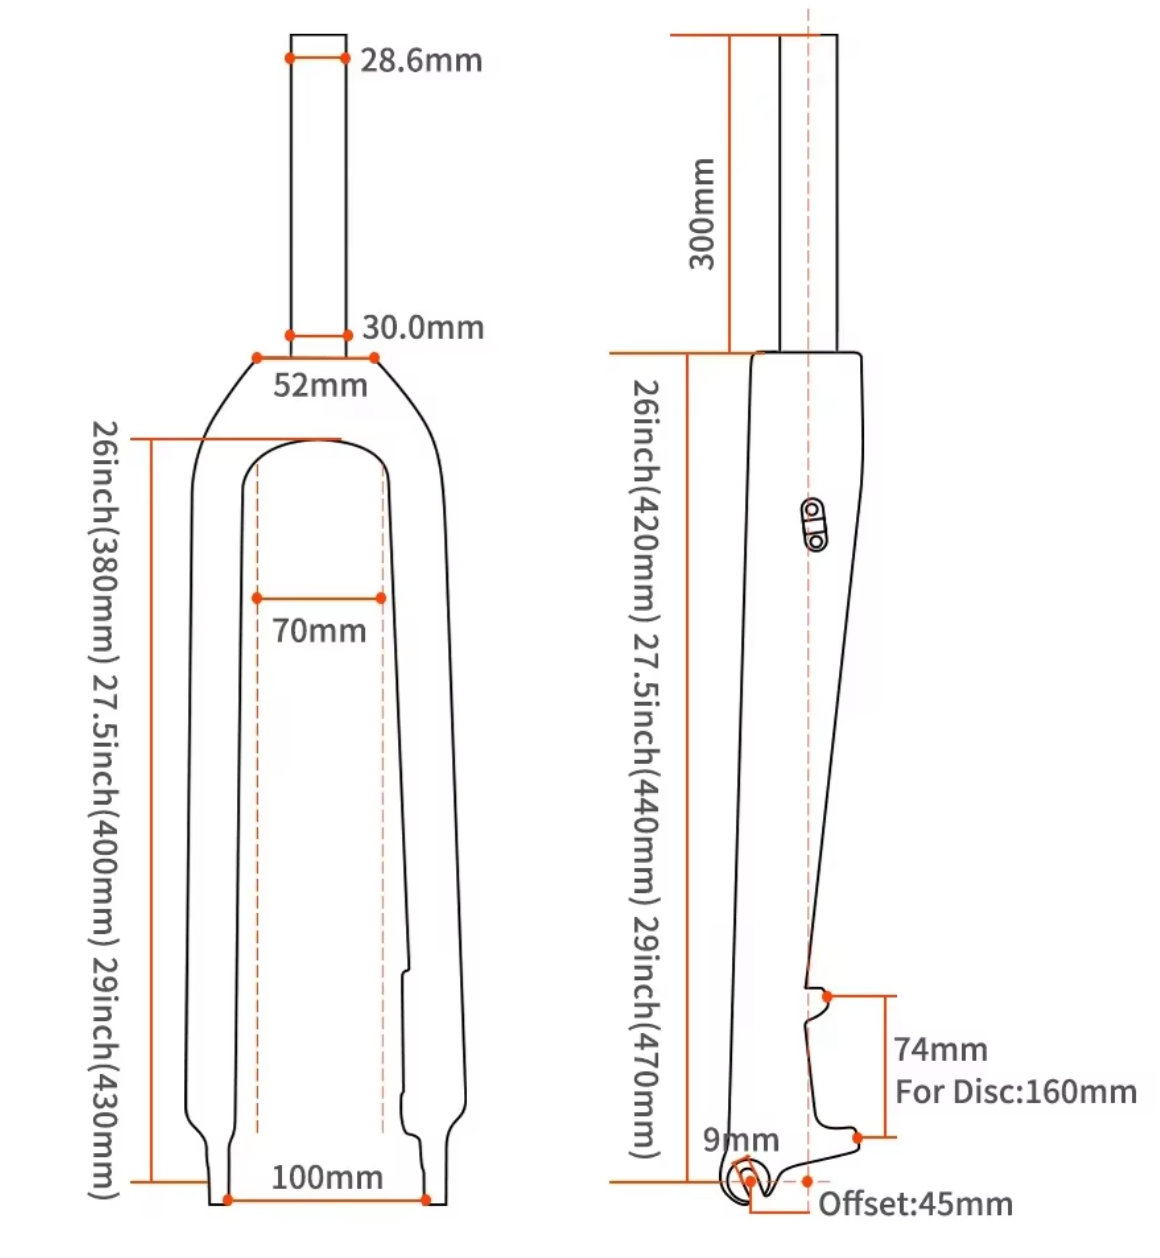
| Steerer | 1-1/8" (28.6mm), 300mm |
| Axle-to-crown | 470mm (29") |
| Brake mount | Post mount, 160mm rotor |
| Dropout | 9mm quick-release |
| Tire clearance | 70mm internal |
Note: The fork came with an expander plug for the carbon steerer — the correct way to compress the headset. Never use a star nut on carbon.
⚖️ Old vs. New#
🛠️ Setup#
The swap is straightforward if you have basic tools and a crown race setter:
- Remove the front wheel, brake caliper, and stem.
- Drop out the old fork, pull the crown race.
- Set the crown race on the new fork (press fit — use a PVC pipe or proper tool).
- Insert the new fork, stack spacers, tighten the stem.
- Reinstall brake caliper — realign pads to the rotor.
- Install the expander plug inside the carbon steerer before compressing the headset.
Tip: Double-check the steerer length before cutting. Measure twice — you cannot undo a cut on carbon.
✅ Result#
The bike feels noticeably lighter at the front and steers with more precision. Braking is more direct without the fork compressing. For a commuter that lives on tarmac and park connectors, it is the right call. The ride is marginally harsher over bumps, but nothing the 38mm tires at lower pressure cannot absorb.
🧾 Gear#
| Part | Link | Price |
|---|---|---|
| TOSEEK Carbon Rigid Fork 29" | AliExpress | ~80 SGD |
| Decathlon Riverside hybrid | stock | — |
| B’Twin Trekking Speed 700×38C | stock | — |
🔮 What’s Next#
With the front end sorted, the next weak link became obvious — the stock B’Twin square-taper crankset and bottom bracket. In Part 2: Shimano CUES Drivetrain Swap I replace the drivetrain with a Shimano CUES 1x setup for smoother shifting and a cleaner chainline.